Many clean plastic food containers can become seed pots. The important parts are drainage, seed-starting mix, steady moisture, the right temperature, and strong light after the shoots emerge.
Gather Your Materials
- Clean, shallow plastic food containers that do not have cracks or sharp edges
- A waterproof tray to catch drips
- Commercial seed-starting mix
- Plant labels and a pencil or waterproof marker
- Seed packets
- A spray bottle or small watering can

Ask an adult to make several small drainage holes in the bottom of each container. The adult should choose a safe tool and work on a protected surface while you stand clear. There is no need for a child to cut large holes with a knife.
Plant the Seeds
- Put the pots on the waterproof tray and fill them with damp seed-starting mix. Use mix sold for seedlings rather than soil dug from the garden.
- Read the seed packet. It tells you how deeply to sow, roughly how long germination takes, and when to start relative to your local last-frost date. Different plants need different schedules.
- Label the pot before tiny shoots make the containers look identical.
- Sow without crowding and water gently so the seeds do not wash away.
- Keep the mix evenly moist, not soggy. Empty standing water from the tray.
- Keep unsprouted pots at the temperature recommended on the packet. A sunny windowsill can become much hotter or colder than the room.
- As soon as shoots appear, give them strong light. Turn pots regularly if light comes from a window so seedlings do not lean in one direction.
Commercial mix may contain vermiculite or perlite. Avoid making dust: open it gently, work in fresh air, and dampen the mix before scooping. Keep the work area away from food, very young children, and pets, then wash your hands.
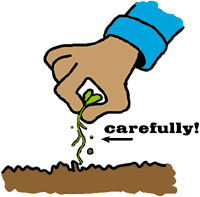
When seedlings have true leaves and begin to crowd, thin them or move them to separate pots. Hold a seedling by a leaf rather than its delicate stem. Before planting outdoors, harden it off gradually.